Roxane & Romilly

Traditional Hi-Tech

  • Home
  • Romilly
  • Romilly SPV
  • Roxane
  • For Sale
  • Discussion

Centreboard Spacers

In his excellent article about the 2001 Manx Traditional Boat festival David Collin mentioned a problem lowering his centreboard because his boat built by Bridgend had not been fitted with pivot spacers.

He said it was an easy job to fit the spacers in the article so I got in touch to ask him for more details. This is what he said at the time.

“The centreboard washer issue is very important. My long sail with the plate jammed up in worsening weather was worrying, and I would not want anyone else to have that experience. Putting in the washers was remarkably easy while the boat was on the trailer, using a car jack to take the weight off the pivot, then slipping out the pin. My washers were polycarbonate, and their dimensions were as follows- internal diameter,1 and five eighths of an inch, external diameter, 2 and three eighths of an inch, thickness 1/4 inch. They solved the problem completely.”

I researched the polycarbonate and found that the strongest most impart and wear resistant polycarbonate sheet is Lexan. I managed to get hold of a 6MM 300mm x 200mm sheet of Lexan from Ebay for £4 delivered. Since the hole size is not critical as they are just spacers my plan was to make the spacers using hole saws.

The following is a picture guide to fitting spacers to a Bridgend boat. If you are not sure if you have these already fitted it is easy to tell as you can just feel if there are spacer washers with your fingers in the slot between the centreboard and the hull at the pivot point. This will look very similar to Steve Booths article on checking the pivot pin but the notes are different and the emphasis is on getting spacers in position.

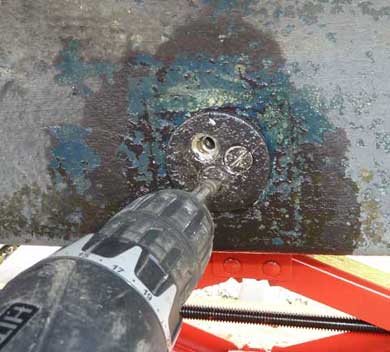
I applied releasing fluid to the screws and tapped them with a flat bladed screw driver and hammer to break the seal. All but one went really easily. To make sure that I didn’t damage the screw heads I used a cordless drill set so that it would torque hammer at them. This worked fine and I had them all out very quickly. If I were doing this again I might borrow an impact screwdriver.

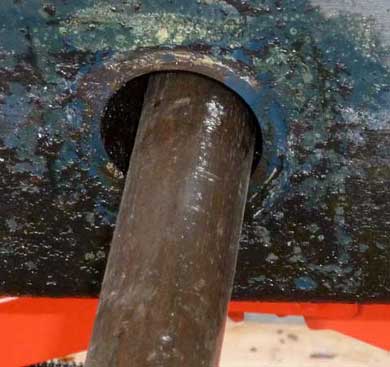
I had to tap out the pin using a length of curtain pole and a hammer. It turned out that although I followed Steve’s advice on experimenting with the jack to get the load on the board just right, it turns out that you also need to have it winched in just the right amount. Once I had the pin out I was able to balance the winch and jack to have the hole line up perfectly.


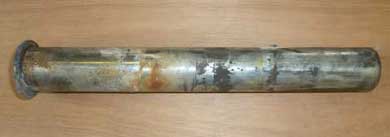
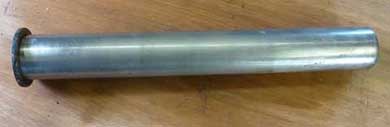
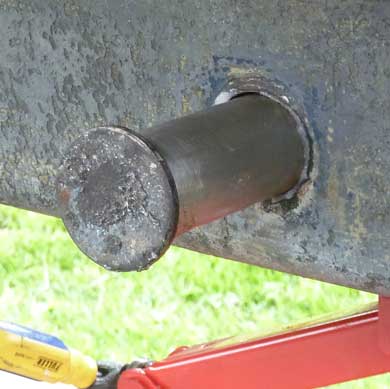
The pin is a very substantial piece of stainless steel. The surface crud was easily cleaned up with a bit of Scotch Brite and WD40.
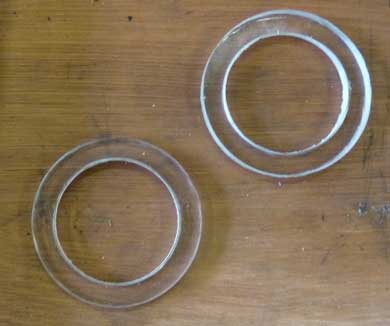

6mm Lexan spacers.


I greased the hole with the same stuff I use to grease the centreboard winch and pushed it in part of the way. I was then able to slip the first spacer in and slide the pin in further. I did exactly the same at the other side and ensured the pin was all the way in with a little tap on the end of my curtain pole.


I put a small amount of Loctite on each screw thread. Although this might make them more difficult to remove next time it gets serviced or new spacers fitted it will reduce the chances of the screws coming lose.

bernard  22 May 2014

I feel guilty that I didn’t take photos when I solved the spacer problem a few years ago without removing the pin. I did it with the boat out of the water but with access to the slot from below (the boat lives on an electric lift in Florida). I cut out two “C” – shaped pieces of plastic from a white plastic cutting board bought at Lidl for about a quid. The board was about 7mm thick and cut it so that the body of the “C” was about 25mm wide and the opening was about 1mm less than the pin diameter. I then simply pushed them on to the shaft. I made it easier by tapering the ends of the C and also leaving a straight back to the C so that it would be easier to push in straight as I forced the open end of the C over the pin.

Much more difficult to describe than to do.

I made several washers expecting them to wear out or fall off but so far no problems, which is good because I have no idea where I put the spares. If I knew where they were I would post a photo.


Phil Holden  22 May 2014

When I first contacted David Collin over this we did have a discussion about those cheap cutting boards but I was thinking of making O’s out of them and still removing the pin as described above. The idea of a C that just slides in and clips over the pin is genius.

One thing I realised early on was the pin is fixed therefore it doesn’t move. The centreboard only pivots on the pin relatively occasionally. There are fairly small forces acting on these spacer washers and very little friction. I would say that in this situation the nylon material you used would be perfect. The fact it is flexible and more malleable when warm would make it possible to make a C with the opening smaller than the pin and have it therefore grip on once inserted. This would probably be the perfect easy fix that would take a matter of minutes.

Thanks for sharing your excellent solution.


PLEASE SUBMIT YOUR COMMENT BELOW

Name (required)

Email (required)

Message (required)

Roxane & Romilly

In this section

  • Romilly 31 "Tarka" Baltic Adventure
  • Brittany Romilly and Roxane
  • Romilly ePropulsion
  • Mast removal
  • Semaine du Golfe 2019
  • La Semaine du Golfe
  • Romilly in the Northern Sporades
  • Festival du Golfe
  • Renovating RY3 centre plate
  • A Run Around Mull
  • Northern Sporades on Romilly
  • Centreboard Spacers
  • Romilly Force 8
  • Easy stepping lug rig
  • Cleaning "Riant"
  • Checking the centreboard pivot
  • Centreboard winch
  • Romilly Beaching Legs
  • New Halyard Arrangement
  • Florida Romilly
  • Augustine on a run
  • 2 Men in a Boat
  • Booms and Romilly
  • Halyard Rigging
  • Stowage
  • Centreboard window
  • Manx Trad Boat Festival 2001
  • Romilly Shirts
  • Electric Drive Hybrid
  • Baby Romilly
  • Hauling Out
  • Scottish Romilly
  • Romilly at Mountshannon
  • Romilly needs beaching legs
  • Outboard Motor
  • Mast turned
  • Lake Marina Mooring
  • Sails
  • Romilly Logo
  • Single Handed - Mast Raising
  • Romilly launch and recovery


Contact    Privacy Statement Privacy Statement